Most people who get land for the first time make the same mistake: they start doing things before they've done any thinking. They plant vegetables in the wrong spot, put the compost too far from the kitchen, build the greenhouse where the shade falls, and then spend years compensating for decisions made in the first month. Good farm design prevents this entirely — and it doesn't require expensive consultants or specialized software. It requires observation, a framework, and patience.
This guide covers the core methodology for designing a productive farm layout from scratch, using the tools and frameworks that professional permaculture designers use. The approach is drawn from permaculture design methodology — a system developed by Bill Mollison and David Holmgren that has been applied to farms, homesteads, and land projects on every continent over the past 50 years.
"The problem is always the solution — if you look carefully enough. Bad drainage becomes a pond. A steep slope becomes a terrace. A windy exposure becomes a windbreak that shelters everything behind it. Design starts with seeing what's there, not imagining what you want."
— Core permaculture design principle
Start with Observation, Not Action
The first rule of good farm design is counterintuitive: do nothing for the first season. This isn't laziness — it's the most productive investment of time you can make. A single year of observation will reveal patterns that would take a decade to discover through trial and error.
What to observe during your first season:
- Water flow: Where does water pool after heavy rain? Where does it run off? Where does it disappear quickly? These patterns determine where you can site ponds, where you need drainage, and where your most moisture-loving crops should go.
- Sun patterns: Where is the sun in summer vs. winter? Which slopes receive morning sun (better for most food crops) vs. afternoon sun? Where do shadows from trees and buildings fall at different times of day and year?
- Wind: Where does wind come from in different seasons? Which areas are sheltered and which are exposed? Wind direction determines where to plant windbreaks and where sensitive crops will struggle.
- Existing ecology: What's already growing voluntarily? Pioneer plants are indicators — dandelions indicate compacted, acidic soil; nettles indicate high nitrogen; certain mosses indicate waterlogging. The plants that grow naturally tell you more about the land than any soil test.
- Animal activity: Where do wildlife paths run? Where do insects congregate? Where do birds nest? These indicate existing ecological relationships worth preserving or building on.
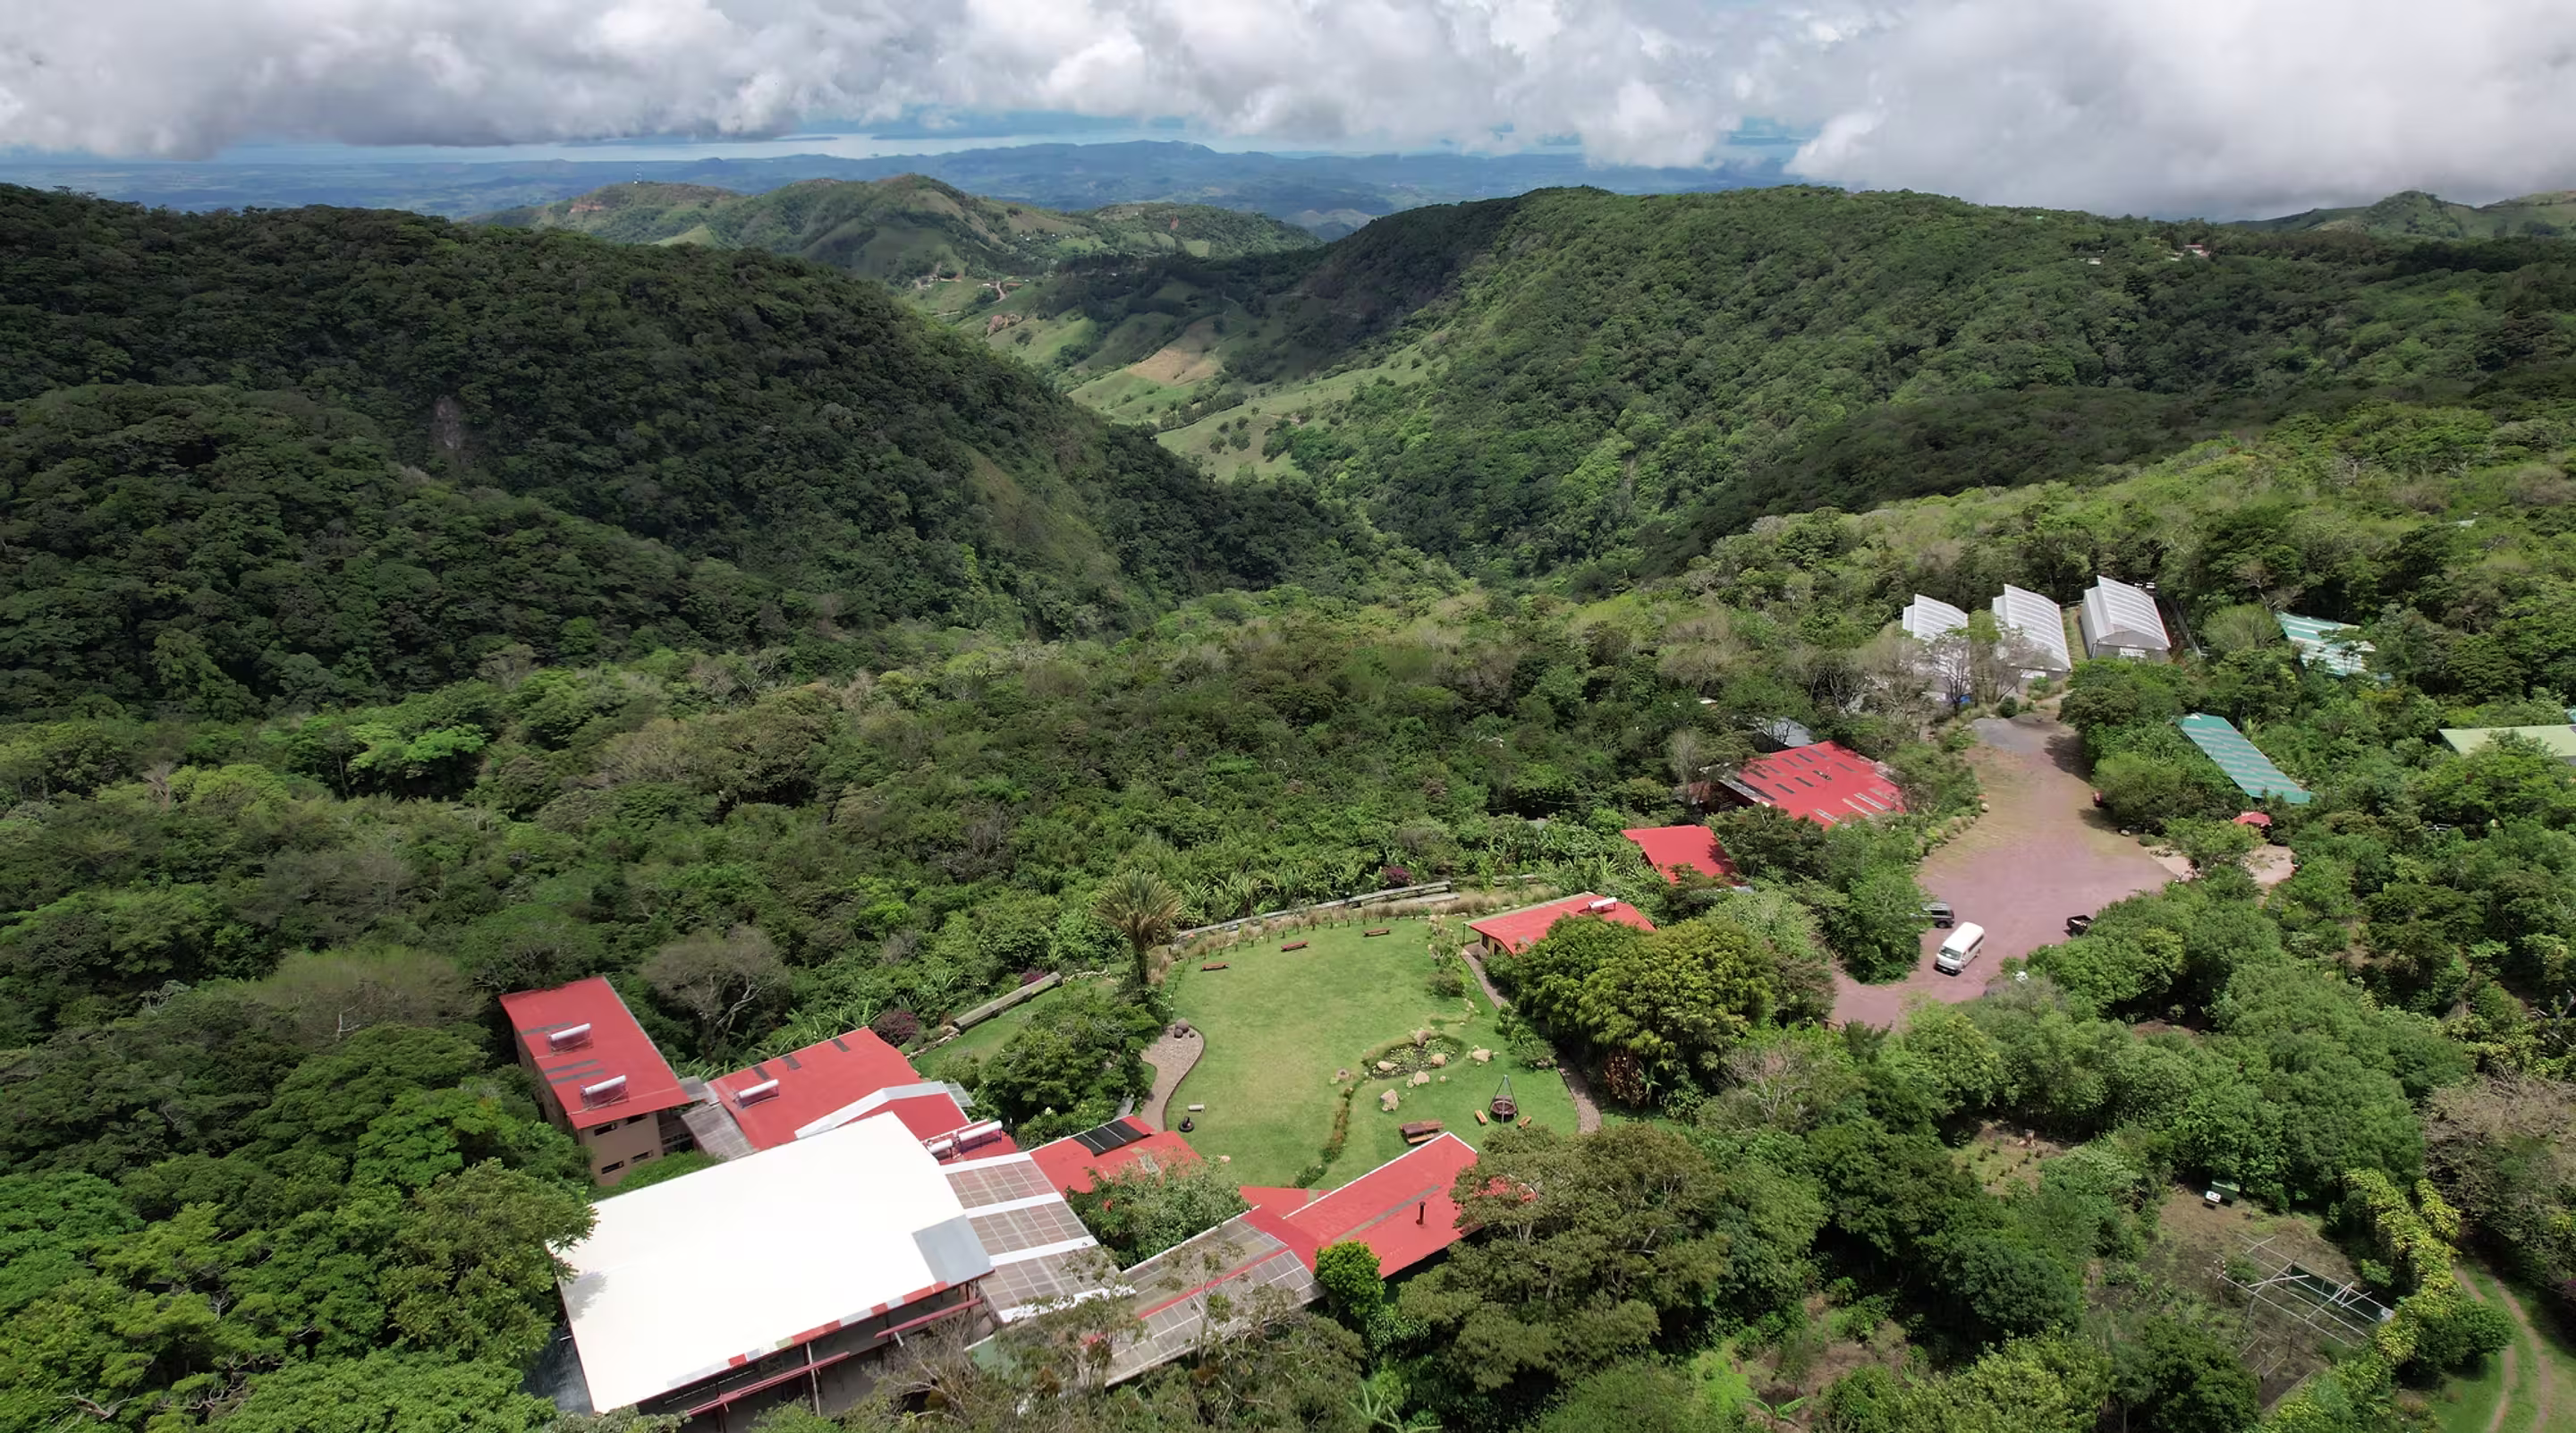
At Valle Escondido, every new student design project begins with a week of observation before any design is attempted. Students who skip this step consistently produce designs that ignore the most important site characteristics.
Zone Analysis: Organizing Space by Frequency of Use
The most important organizational concept in permaculture farm design is the zone system. Zones organize the landscape based on how frequently you visit each area and how much attention each element needs.
The logic is simple: things you need every day should be closest to where you live. Things that need minimal attention can be further away. This seems obvious, but most farm designs ignore it completely, resulting in massive energy waste walking long distances for daily tasks.
Zone 0 — The Home
Your living space is the center of the design. Everything else in the farm is organized around its relationship to Zone 0. The home's orientation, its windows, its connection to water, its relationship to prevailing winds — all of these affect the design of everything else.
Zone 1 — Daily Use
Zone 1 is right outside your door — the kitchen garden, the herb spiral, the compost bins, the tool storage. Zone 1 elements need visiting every day. Salad greens, culinary herbs, tomatoes, peppers, eggs if you have chickens — anything you need for daily meals. Zone 1 should be highly productive per square meter, intensively managed, and immediately accessible in all weather.
At Valle Escondido, Zone 1 includes the student kitchen garden, the medicinal herb spiral, and the processing area for daily harvests. It's positioned within 30 meters of the main kitchen.
Zone 2 — Regular Use
Zone 2 contains elements visited several times per week: fruit trees, larger vegetable beds, perennial food plants, beehives, small livestock. This is where most of a farm's food production typically happens. Zone 2 requires regular but not daily attention — watering, harvesting, monitoring, but not constant presence.
Zone 3 — Occasional Use
Zone 3 includes large-scale food crops, fodder systems for animals, staple crops like grains or beans. These are visited weekly or less. Once established, Zone 3 systems are largely self-managing — they need occasional harvesting and maintenance, but not intensive attention.
Zone 4 — Minimal Management
Zone 4 is semi-wild land: managed forest, timber systems, extended pasture. It might be visited monthly. Zone 4 generates yields (timber, forage, wild harvests) but with minimal input from the farmer.
Zone 5 — Wild Land
Zone 5 is unmanaged wilderness — left entirely to natural processes. It's not wasted land; it's a reservoir of biodiversity, genetic material, and ecological services that support everything else on the farm. Every farm should preserve Zone 5 areas, no matter how small.
Sector Analysis: Working with External Energies
While zones are about how you use the land, sectors are about what the land receives from outside: sun angles, wind direction, water flow from neighboring properties, fire risk, views, noise, wildlife corridors. A sector map overlays these external forces onto your site map.
Sector analysis answers questions like: Where should the windbreak go to protect the kitchen garden from the prevailing north wind? Where is fire risk highest in dry season? Which direction does the neighbor's pesticide spray drift? These external energies can't be controlled, but they can be managed through intelligent placement of elements.
At Valle Escondido, sector analysis revealed that prevailing afternoon winds come from the northwest during dry season and bring moisture and fog during wet season. The design uses this: windbreaks on the northwest protect sensitive crops, while the same wind direction is used to harvest moisture from fog using fog-catching nets in the most exposed sections.
Relative Location: Stacking Functions
Once you understand zones and sectors, the next question is: where exactly should each element go relative to the others? Good farm design places elements so they serve multiple functions and so each element supports the others.
Classic examples of intelligent relative location:
- Chickens behind the vegetable garden: They scratch through harvested beds, eating pest eggs and weed seeds, and their manure fertilizes the soil — just by moving them through in the natural rotation
- Compost bins between kitchen and garden: Kitchen scraps travel a short distance to the bins; finished compost travels a short distance to the beds
- Fruit trees on the south-facing side of vegetable beds: They provide light shade in hot summers but don't block winter sun because the sun angle is lower
- Water storage above the garden: Gravity-fed irrigation requires no pumping energy; the tank is higher than the beds it waters
Every element in a good design serves at least three functions. If you can only identify one function for a plant or structure, keep thinking.
Water: Design It First, Build Everything Else Around It
Water is the single most important element in any farm design. Before placing any other element on your site, design the water system completely. Water flows downhill and cannot be moved uphill without energy input. This means the entire site design must work with the topography.
Key water design principles:
Slow it, spread it, sink it. Every drop of rain that falls on your land should be captured as high on the landscape as possible and allowed to percolate slowly through the system. Swales (level trenches on contour) are the primary tool for this — they catch water, hold it level, and allow it to percolate into the soil rather than running off.
Size your storage correctly. A farm that has ponds, tanks, and swales sized for 150% of typical dry season needs is resilient. One that has storage sized for typical rainfall is vulnerable in any drought year. At Valle Escondido, water storage is sized for the driest year on record, not the average year.
Place ponds in the landscape, not just conveniently. A pond should sit where topography naturally concentrates water — a valley, a hollow, a transition between zones. Artificially sited ponds require constant leakage management because the surrounding land wants to drain, not hold water.
The Productive Farm Layout: A Practical Template
For a beginner setting up a farm of 0.5–5 hectares, here is a practical starting layout that applies all of the above principles:
North side of house (Zone 1): Kitchen garden with annual vegetables, herbs, and medicinal plants. Intensive production, easy access. Compost bins at the kitchen garden boundary. Total size: 100–500 square meters.
South and east of house (Zone 2): Fruit and nut trees in a food forest design. Perennial vegetables, berry bushes, beehives. Annual production integrated between tree canopy layers. Total size: 500–2000 square meters.
Peripheral areas (Zone 3): Staple crops, fodder systems for any livestock. Lower-maintenance perennial food systems. Animals rotate through here to maintain fertility cycles.
Edges (Zone 4/5): Forest corridors, hedgerows, wildlife areas, timber trees on the most exposed edges. These simultaneously provide ecological services, act as windbreaks, and generate occasional yields from timber, firewood, or wild harvest.
Design Takes Time — and So Does Learning It
A good farm design is never "finished." It evolves as you observe more, as conditions change, as your understanding deepens. The best farmers are always redesigning — adjusting based on what they learn each season, adding new elements, and removing what doesn't work.
Learning to design well takes time and practice. Reading frameworks like this one is a start, but the real learning comes from applying them to a real piece of land. That's why the Permaculture Design Certificate at Valle Escondido dedicates significant time to actual design projects — students work on real sites, produce complete designs, and defend their reasoning.
If you're ready to move from reading about farm design to actually learning it, explore the principles behind permaculture design or reach out to ask about the next PDC cohort at Valle Escondido.